Table of contents
Estimated reading time: 15 minutes
How do you restore Victorian flooring whilst preserving its historical character and value? Recent research shows that 77% of people in the UK want to see original period home features restored, and Victorian floors represent some of the most rewarding projects for period property owners.
Your Victorian flooring tells a story that spans more than a century. Whether you’ve just lifted old carpets to reveal Victorian flooring tiles or you’re working with exposed boards in your Victorian flooring hallway, these original features add both authenticity and significant value to your property.
This guide explains how to assess your period flooring, choose appropriate restoration methods, and maintain the results for years to come. We’ll cover everything from traditional encaustic tiles to original pine floorboards, helping you make informed decisions about your restoration project.
What You Need to Know About Victorian Flooring Types
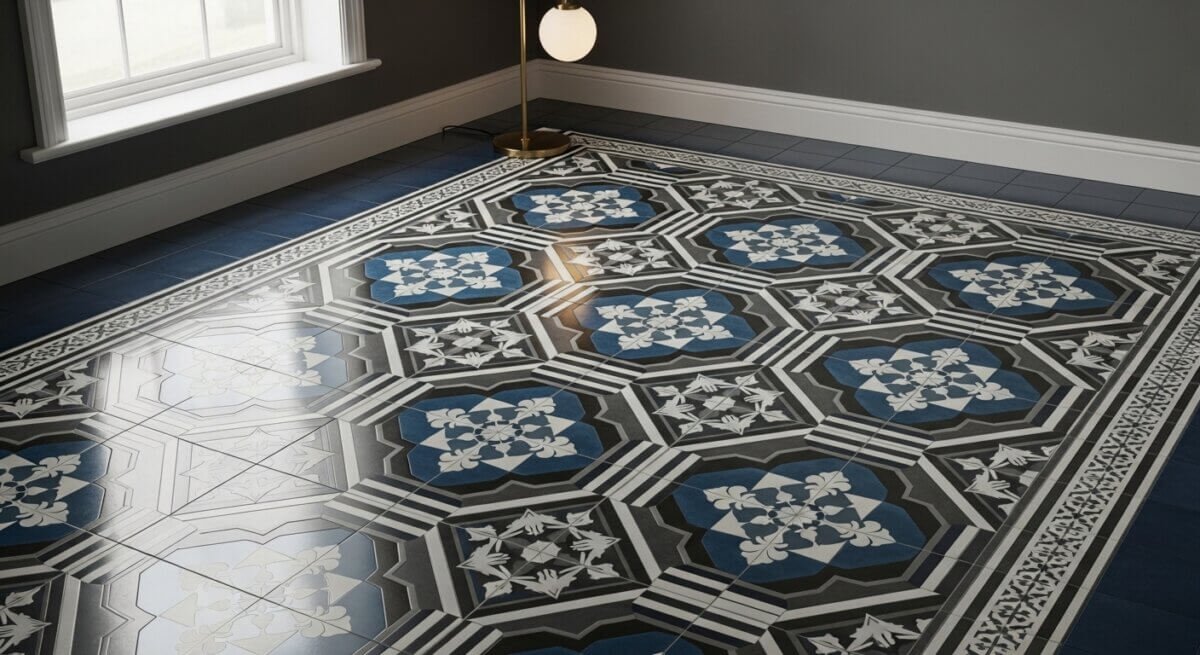
Victorian Flooring Tiles: Encaustic and Geometric Designs
The Gothic Revival movement of the early nineteenth century brought Victorian flooring tiles into British homes. Archaeological discoveries from mediaeval sites created renewed interest in historical architecture, leading to demand for decorative elements that reflected the grandeur of monasteries and royal palaces.
Herbert Minton of Stoke transformed tile production when he began experimenting in 1828 and purchased a half share in Samuel Wright’s patent for encaustic tiles in 1830.
Although his first major commission came in 1842 for the Temple Church in London, his reputation was established when Queen Victoria and Prince Albert commissioned him to create an encaustic pavement for Osborne House on the Isle of Wight.
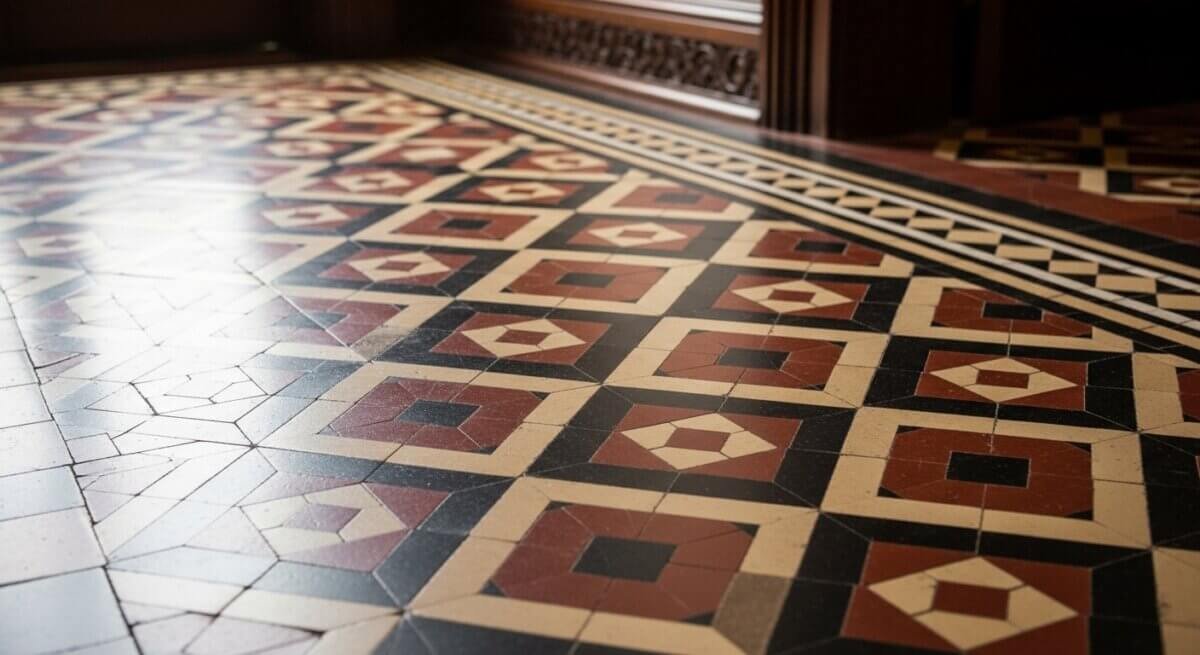
Encaustic tiles represent Victorian craftsmanship at its finest. The manufacturing process creates patterns by layering different colours of clay before firing, which means the design runs through the entire tile thickness rather than sitting on the surface.
This technique required considerable skill and precise temperature control, making the tiles expensive but extraordinarily durable. Patterns included delicate floral motifs, heraldic symbols, ornate fleur-de-lys, and quatrefoil designs.
Geometric tiles offered homeowners a more affordable option. Manufacturers produced these smaller, unglazed pieces in single colours, arranging triangles, lozenges, squares, rectangles, diamonds, and octagons into striking patterns. Early Victorian designs often featured black-and-white chequerboard patterns, whilst mosaic tiles consisted of individual shapes measuring less than one inch square.
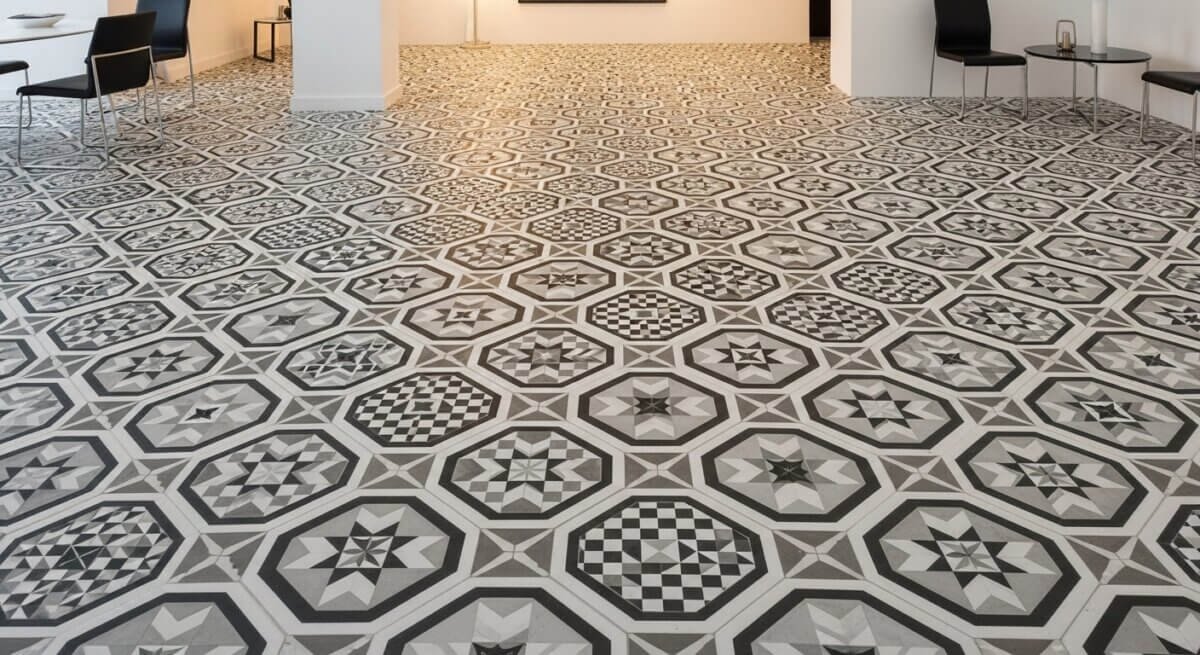
From the 1860s onwards, both encaustic and geometric tiled floors appeared in churches, grand Victorian villas, and public buildings including the Victoria and Albert Museum. By the 1890s, tiled floors and pathways had become standard features in ordinary Victorian houses throughout Britain.
Understanding Victorian Floorboards: Wood Types and Characteristics
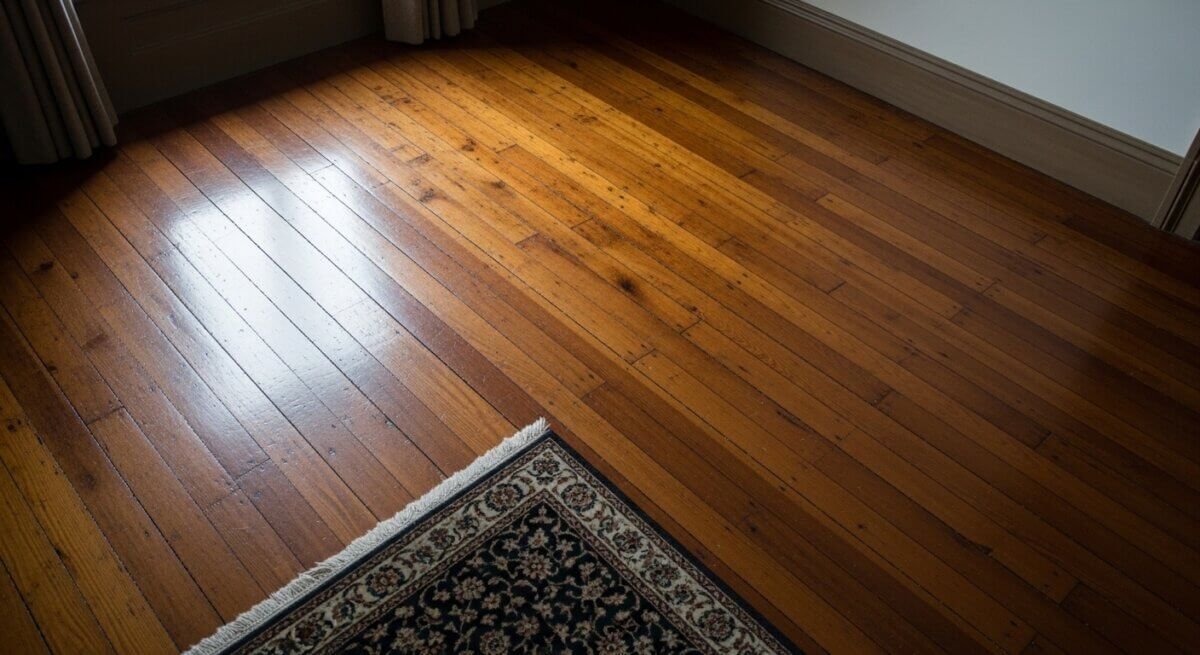
Pine floors dominated Victorian homes throughout the era. These boards featured tongue-and-groove fixing or face nailing, with wide planks cut from slow-growing trees that produced denser, more durable wood. The finest examples were cut from the full width of tree trunks, creating generous boards that modern production methods rarely replicate.
The Arts & Crafts period sparked a revival in oak flooring, valued for its natural beauty and enhanced through simple polishing. This movement also created interest in exotic hardwoods, maple, and walnut, though well-chosen pine and fir planks remained acceptable. Victorian homes incorporated mahogany and teak for their durability and rich colour tones.
Most pine floors were covered with rugs, whilst the visible surrounds received staining and polishing with beeswax and turpentine to mimic superior timber. Some borders featured stencilling as an affordable alternative to parquetry, and during the 1860s, floors painted in Indian reds and deep blues became fashionable.
How to Recognise Original Victorian Flooring
Genuine Victorian boards show distinctive characteristics that separate them from modern replacements. Original boards feature wide planks with tongue-and-groove edges, weathered patina, and authentic craftsmanship marks such as nail holes or subtle unevenness. Many Victorian floorboards bear saw marks from the cutting process, a detail absent in modern machined boards. Original boards also vary in thickness due to manual milling processes, and decades of use create an undulating surface that adds character.
Authentic encaustic tiles maintain their patterns even after extensive wear because the design penetrates the entire tile body. You may find traces of old wax, shellac, or distinctive knots that mass production cannot recreate. Geometric tiles demonstrate their authenticity through precise mathematical arrangements and material quality that has survived over 150 years of use. The natural ageing process develops deep, rich colours in wood that artificial staining cannot replicate, resulting from years of exposure to light, air, and historical maintenance with oils and waxes.
Assessing Your Victorian Floor Before Restoration
Thorough assessment determines whether restoration will succeed and prevents costly mistakes. Jumping straight into sanding risks damaging boards beyond repair or overlooking structural problems that could compromise your entire project.
Uncovering Hidden Victorian Flooring
Many British homes hide original oak, pine, or parquet beneath decades of carpet, lino, or paint. Check corners of existing floor coverings for signs of thick, wide boards and the distinctive rich colour that only aged wood develops.
Original craftsmanship often reveals itself through picture frame borders or unexpected geometric patterns visible at carpet edges. Authentic period timber feels solid underfoot, lacking the hollow resonance or flex typical of modern alternatives.
Carefully lift a small section of carpet to examine what lies beneath. You might discover beautifully patterned Victorian tiles that have been hidden under hallway carpets for decades. However, check for moisture problems using a damp metre before proceeding with any work.
Readings between 0.15 and 0.17 suggest borderline dampness that needs addressing before restoration can begin. Higher readings indicate active moisture issues from failed door seals, poor ventilation, or rising damp that must be resolved first.
Checking for Damage, Wear, and Structural Issues
Victorian ground floors rely on suspended timber joists that can suffer from dry rot, woodworm, or decay where joist ends meet damp masonry. Test the floor’s stability by walking across the entire surface, noting areas of bounce or movement. Most minor springiness creates comfort rather than safety concerns, though certain warning signs require immediate professional assessment.
Watch for telltale moisture signs: faint tide marks on skirting boards, paint that bubbles near floor level, or timber discolouration where joists meet external walls. These indicators become more obvious after periods of rain or heavy bathroom use, helping distinguish normal ageing from developing problems.
Pay particular attention to areas around external walls, chimney breasts, and bay windows, looking for dark staining, blistered paint, flaking finishes, or white salt deposits in nearby plaster.
Test timber condition by pressing gently along skirting boards and exposed floorboard edges. Healthy wood feels firm and resists pressure, whilst soft or fibrous areas indicate moisture damage.
A springy floor near your front door might result from deteriorating UPVC door seals that allow water to penetrate from the doorstep, causing rot and fungal decay in the timber structure below.
Determining Whether to Restore or Replace
Visible grooves in planks or exposed nail heads indicate the flooring has been sanded too many times and cannot survive further restoration. Extensive damage from pests, mould, or water signals that the timber has reached the end of its useful life. Sometimes damage affects only specific areas, making selective board replacement a viable option when water damage impacts just a few planks.
Restoration typically costs much less than complete replacement since you only need to buy treatment products rather than new flooring. Professional Victorian tile restoration in London starts at around £50 per square metre for basic cleaning and sealing, rising above £150 per square metre for extensive repair work.
Understanding When to Hire a Specialist
Professional assessment covers board dimensions, pattern integrity, structural stability, rot extent, and movement issues. Specialists can clean or lightly sand test areas to demonstrate potential results before you commit to the full project. Authentic restoration demands hand tools and traditional techniques that prevent damage to delicate period materials.
Professionals already own the necessary equipment, whilst purchasing or hiring tools for a single project proves surprisingly expensive. Expert repairs use reclaimed period timber or carefully matched eco-friendly compounds to achieve seamless results.

Step-by-Step Victorian Flooring Restoration Process
Successful restoration depends on completing each stage properly. Rushing preparation creates problems that emerge weeks later, whilst incomplete cleaning leaves contaminants that prevent effective sealing.
Step 1: Prepare and Clean the Surface
Clear the room completely, removing all furniture, floor coverings, nails, and attached materials. Vacuum thoroughly to eliminate loose dirt and debris. For Victorian flooring tiles, sweep or vacuum first, then hoover the floor and scrape off surface debris. Test for dampness using a damp metre before starting – you need baseline moisture readings to guide your work.
Inspect floorboards carefully for loose boards, protruding nails, previous repairs, and signs of wood rot, particularly near exterior walls. Remove visible nails and countersink remaining ones below the surface. Secure loose boards using screws rather than nails for a more durable fix.
Step 2: Remove Old Sealers, Wax, and Coatings
Apply sealer remover neat to strip water-based acrylic sealers and waxes from the surface. Allow the product 10 to 20 minutes to soften the coating, working in manageable sections as the chemical may penetrate porous tiles. Scrub using a black cleaning pad or natural bristle brush whilst wearing protective gloves throughout.
For stubborn areas, apply a 50:50 dilution of alkaline cleaner with cleaning gel, leaving both products to dwell for sixty minutes. Extract the dissolved solution using a wet vacuum, then rinse the area thoroughly.
Step 3: Repair Damaged Tiles or Floorboards
Replace damaged board sections with reclaimed pine that matches the age and character of your original flooring. For Victorian tiles, carefully remove broken pieces without disturbing adjacent tiles, rebuild the base using self-levelling compound, then fix replacement tiles with fresh adhesive once the compound has set.
Fill small chips in tiles using epoxy putty in matching colours. Knead the putty for 5-6 minutes until it becomes malleable, press firmly into chips, and smooth the surface with a damp finger. Address any woodworm infestation in affected floorboard areas before proceeding.
Step 4: Replace Missing Grout or Fill Gaps Between Boards
Use pine slivers rather than modern filler for authentic restoration results. These thin wooden strips accommodate seasonal movement, match the original materials, and provide superior longevity. Apply wood glue to slivers and tap gently into gaps using a rubber mallet.
For tiled areas, remove old grout to a minimum depth of 3mm using a grout rake or oscillating tool. Mix fresh grout according to manufacturer instructions and apply evenly with a grout float.
Step 5: Sand and Refinish Wooden Floors
Start with a professional-grade drum sander fitted with coarse-grit paper (40-60 grit) to remove old finishes and level the boards. Keep consistent pressure and maintain constant movement to prevent creating dips in soft pine.
Work through medium grits (80-100 grit) before finishing with finer papers (120-150 grit). Complete corners and edges using an edging sander. Vacuum between each sanding stage and inspect your progress under good lighting.
Step 6: Apply Appropriate Sealers and Protective Finishes
Apply hard wax oil sparingly to wooden floors in the direction of the grain, using a short-pile roller and working 2-3 boards at a time. Remove excess immediately with a lint-free cloth. Allow approximately 4 hours drying time between coats, though overnight drying produces better results.
For Victorian tiles, use a breathable impregnating sealer that protects against water and oil whilst allowing moisture to pass through the material. Ensure tiles are completely dry – wait at least 5 days after cleaning before applying any sealer.
Maintaining Your Restored Victorian Flooring
Proper maintenance protects your restoration investment and extends the life of your Victorian flooring for decades to come.
Daily and Weekly Cleaning Routines
Sweep or vacuum weekly to remove grit and surface debris that can scratch both tiles and floorboards. Use a microfibre mop for dust removal, which proves gentler than traditional bristle brooms. Clean with pH-neutral products specifically formulated for wooden flooring, as standard household cleaners degrade oil finishes over time.
For sealed tiles, use only the maintenance cleaner recommended by your sealer manufacturer. Avoid excessive water or steam, which can cause staining, warping, or rot in absorbent Victorian wood. Damp-mop rather than saturating the surface, and ensure proper ventilation for quick drying.
Protecting High-Traffic Areas in Victorian Flooring Hallway
Place mats at entrances to trap dirt and moisture before it reaches your Victorian flooring hallway. High-traffic zones benefit from an extra layer of sealer for added protection. Attach felt pads under furniture legs to prevent scratches and indentation.
Establish a household rule of removing shoes at entry points to reduce grit accumulation. This simple measure significantly reduces wear on your restored surfaces.
Preventing Stains and Water Damage
Victorian wood is more absorbent than newer timber, making prompt spill cleanup vital. Blot spills immediately with a clean cloth rather than wiping, which spreads the liquid. Address any leaks quickly to prevent seepage into porous materials.
Water damage poses the greatest threat to Victorian flooring, so immediate action is essential when spills occur.
When to Reseal or Refinish
Test sealer effectiveness by dropping water on tiles; if water beads, the seal remains intact, but quick absorption signals the need for resealing. Reseal Victorian flooring tiles every 2-3 years in high-traffic areas.
Wax finishes require reapplication every 6-12 months, whilst sealants last several years. However, it’s worth noting that high-traffic areas may need attention more frequently than these general guidelines suggest.
Modern Victorian Flooring Options and Design Ideas
Victorian Tile Effect Vinyl as a Practical Alternative
Luxury vinyl tile (LVT) flooring offers Victorian-style appeal with modern practicality. These products resist water damage, install easily through click systems that work over uneven subfloors, and require no glue or grout. The Karndean Heritage Collection includes Victorian-inspired designs such as Clifton, Lansdown, Mayfair, and Montpellier, with the Lansdown LANS-04 green, cream, and charcoal mosaic proving particularly popular. LVT handles spills and stains without the intensive maintenance that authentic tiles require.
Combining Period Features with Modern Living
Restored floorboards offer an economical alternative to tile replacement. Consider pairing exposed boards with stair runners or hallway runners that echo encaustic tile patterns. This approach maintains period character whilst adding contemporary comfort and practicality.
Design Ideas for Hallways and Entrance Areas
Original Minton tiles remain among the finest features in English period homes. However, reproduction Victorian tiles from companies like Original Style create impressive focal points, though installation costs can exceed £8,000. Your Victorian hallway establishes the character for your entire home, highlighting original features whilst welcoming visitors.
Property Value Benefits of Period Floor Restoration
Sanded floors paired with quality rugs typically deliver the best return on investment. This combination provides flexibility for future owners whilst preserving the period authenticity that attracts buyers to character properties.
Conclusion
Victorian flooring restoration offers property owners the opportunity to preserve architectural heritage whilst adding both character and value to their homes. This guide has covered the essential steps needed to assess, restore, and maintain period floors, whether you’re working with original encaustic tiles or pine floorboards.
Success in restoration projects depends on thorough assessment before you begin. Understanding the condition of your floors, identifying potential structural issues, and recognising when professional help is needed can save both time and money. Remember that authentic restoration takes patience – rushing through preparation stages often creates problems that become apparent weeks or months later.
Regular maintenance protects your investment once restoration is complete. Victorian materials require different care than modern alternatives, but the results justify the effort. Whether you choose to tackle the work yourself or hire specialists, restored Victorian flooring provides timeless appeal that modern replacements cannot match.
If you’re considering Victorian flooring restoration, start with a thorough assessment of your floors’ condition and consult professionals when structural issues or extensive damage are present.
Key Takeaways
Victorian flooring restoration preserves historical craftsmanship whilst significantly boosting property value, but success depends on proper assessment, methodical restoration, and ongoing maintenance.
• Assess before acting: Check for structural damage, moisture issues, and authenticity markers like wide planks with tongue-and-groove edges before starting restoration work.
• Follow the six-step process: Prepare surfaces, strip old coatings, repair damage, fill gaps with period-appropriate materials, sand progressively, and apply breathable sealers.
• Maintain regularly for longevity: Use pH-neutral cleaners, protect high-traffic areas with mats, clean spills immediately, and reseal tiles every 2-3 years.
• Consider alternatives when needed: Victorian tile effect vinyl offers water-resistance and easier maintenance whilst preserving period aesthetics for practical modern living.
• Hire specialists for complex work: Professional restoration costs £50-150 per square metre but ensures authentic techniques and proper structural assessment for valuable period features.
Authentic Victorian flooring restoration requires investment in time and expertise, but the resulting combination of historical character and increased property value makes it worthwhile for period home owners committed to preserving architectural heritage.
FAQs
Q1. Is restoring original Victorian floorboards worth the investment? Restoring original Victorian floorboards is often worthwhile if they’re structurally sound and haven’t been sanded excessively in the past. It preserves the character of your period property, can increase its overall value, and proves more cost-effective over time than complete replacement. Original boards feature unique characteristics like wide planks, authentic patina, and craftsmanship that modern alternatives cannot replicate.
Q2. How do I properly clean Victorian floorboards before restoration? Begin by thoroughly sweeping or vacuuming your Victorian floorboards to remove all loose dirt and debris, using a vacuum with a soft brush attachment to prevent scratching. Next, prepare a gentle cleaning solution using warm water mixed with a small amount of pH-neutral wood cleaner. Avoid excessive water or harsh chemicals, as Victorian wood is more absorbent than modern timber and can be damaged by aggressive cleaning methods.
Q3. What grit sandpaper should I use when sanding Victorian floors? Start with coarse-grit sandpaper (40-60 grit) to remove old finishes and level the boards, then progress through medium grits (80-100 grit) before finishing with finer grits (120-180 grit) for a smooth surface. It’s essential to work through these stages methodically and vacuum thoroughly between each sanding stage. Using only coarse grit will leave visible scratches that show through your final varnish or sealer.
Q4. How can I tell if my Victorian floor needs professional restoration? Hire a specialist if you notice significant structural issues such as extensive rot, severe woodworm damage, or major movement in the boards. Professionals can properly assess board stability, identify moisture problems using damp metres, and determine whether restoration is viable. If grooves appear in planks or nails have become visible from previous sanding, the floor may have been restored too many times and requires expert evaluation.
Q5. How often should I reseal Victorian flooring tiles? Victorian flooring tiles should be resealed every 2-3 years in high-traffic areas such as hallways and entrance areas. You can test whether resealing is needed by dropping water on the tiles—if the water beads up, the seal is still effective, but if it absorbs quickly, it’s time to reseal. Regular maintenance with pH-neutral cleaners between sealing helps protect your tiles and extends the life of the sealer.